

下の歪み効果を試すか、自分の写真を開いてください。
極座標エフェクト
Open a photo and apply 極座標 in PictorX. This look is part of リキッドレンズ—adjust the settings on this page, then keep editing with layers, text, and other effects in the same workspace. 下の歪み効果を試すか、自分の写真を開いてください。
使い方
- Open this page and try 極座標 on the sample, or open your own photo.
- Tune the 極座標 settings, or switch to another look in リキッドレンズ.
- Save the result, or keep editing with layers, text, and other effects in PictorX.
What the 極座標 effect does
極座標 is one of the looks in PictorX リキッドレンズ. Apply it in your browser, then keep working in the same project—crop, type, or add another effect without starting over.
More looks in リキッドレンズ
This page opens リキッドレンズ with 極座標 already selected. Switch looks on the demo to compare styles, or open the full リキッドレンズ page to browse every option in the set.
Looks in this set
よくある質問
極座標フィルターは何をするのですか?
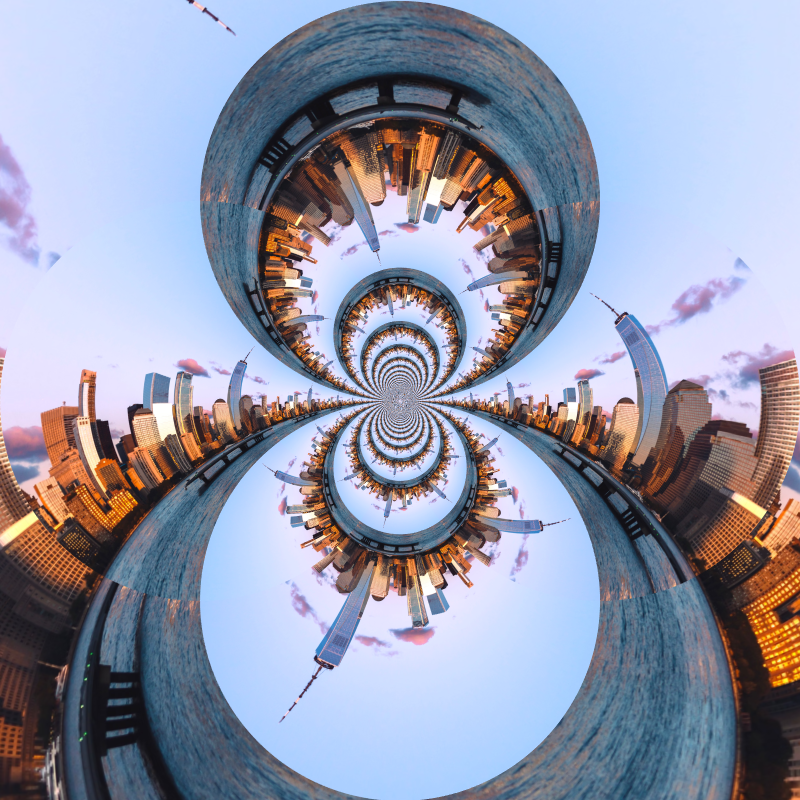
「Rect to Polar」(直交座標から極座標へ)は写真を中心のまわりに曲げます。左右の端がつながり、上端は中心に縮み、下端は外側の円になります。「Polar to Rect」(極座標から直交座標へ)はその逆で、円形の画像を平らな帯に広げます。
極座標でタイニープラネットを作るには?
横長の風景写真かパノラマを使います。エディターで上下反転して地面を上にしてから、「Rect to Polar」を適用します。地面が中心の小さな惑星になり、そのまわりを空が囲みます。「タイニープラネット」ツールなら、これらの手順を自動で行い、新しい空も加えます。
「種類」と「開始角度」は何をしますか?
「種類」で「Rect to Polar」と「Polar to Rect」を切り替えます。「Rect to Polar」では、「開始角度」(0~180°)が円を回転させ、写真の左右の端がつながる継ぎ目を動かすので、無地の部分に隠せます。
円の外側の四隅はどうなりますか?
初期設定では透明なので、丸い PNG として保存できます。「背景」で、単色、線形または円形のグラデーション、元の画像で塗りつぶすこともできます。
タイニープラネット以外に極座標は何に使えますか?
ストライプや文字をリング状に巻く、並んだ木や建物を円形の縁取りにする、丸いロゴや曼荼羅のような模様を作る、などです。「Polar to Rect」では、時計の文字盤や皿のような丸い被写体を帯状に広げられます。
関連ツール
リキッドレンズ
極座標、リップル、ガラス、スフェライズ、タイムワープ、ツイール、折り、曲げで写真をワープ。
極座標反転 effect
Apply a 極座標反転 effect to photos free in your browser. Open the リキッドレンズ tools, tune the look, and keep editing in PictorX. No install.
波紋エフェクト
写真にオンラインで水の波紋の変形を追加。池に落ちたしずくのように、中心から輪が広がります。周波数、変位、量を設定して保存できます。
ガラスエフェクト
波打つ型板ガラス越しに見たような写真に。ガラス模様の「サイズ」を設定し、「すりガラス」「屈折ガラス」と比べられます。
屈折ガラス effect
Apply a 屈折ガラス effect to photos free in your browser. Open the リキッドレンズ tools, tune the look, and keep editing in PictorX. No install.
球面 effect
Apply a 球面 effect to photos free in your browser. Open the リキッドレンズ tools, tune the look, and keep editing in PictorX. No install.
タイムワープ effect
Apply a タイムワープ effect to photos free in your browser. Open the リキッドレンズ tools, tune the look, and keep editing in PictorX. No install.
試してみますか?
ブラウザで PictorX を開きます。インストール不要、始めるのにクレジットカードも不要です。
エディターへ